Start a schedule on your own
Set up your own schedule without adding coworkers, students, or a school organization.
Steps
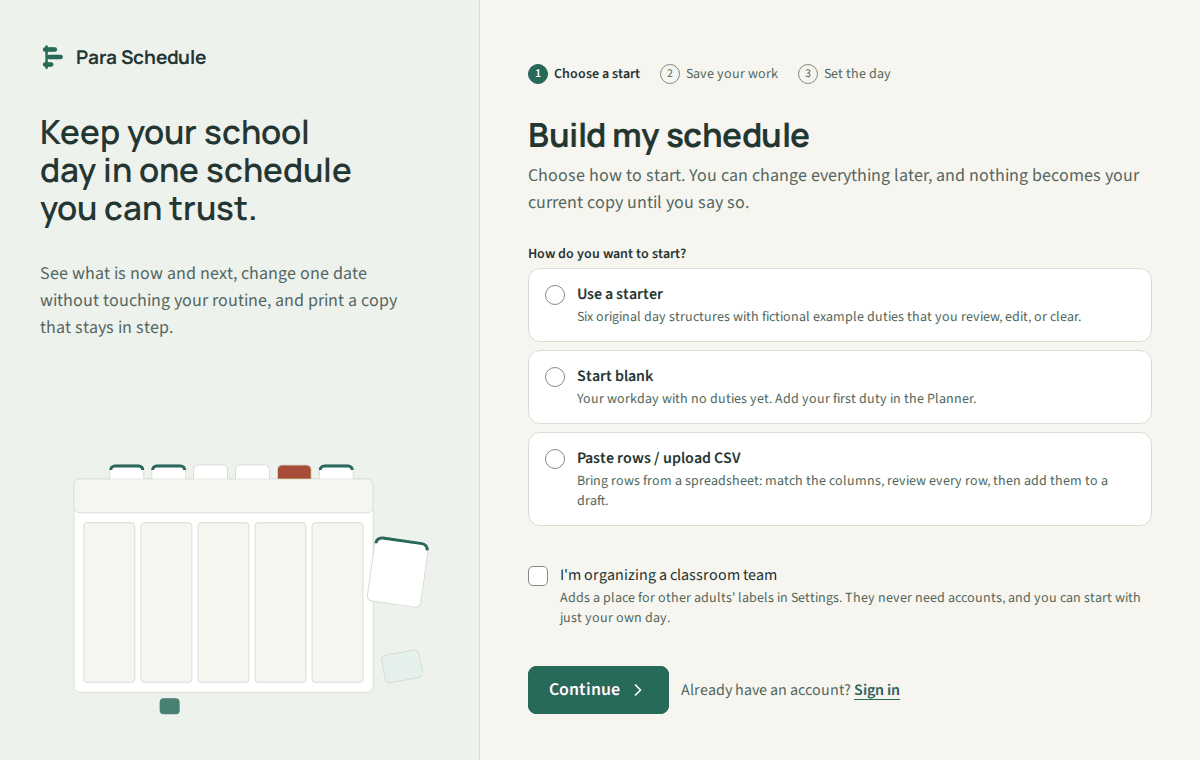
Choose Build my schedule. Pick a starter, start blank, or paste rows from a spreadsheet. Leave the classroom team choice off to keep the schedule personal.
Create an account, or sign in if you have one. The start you picked is kept while you do.
Set the day: a title for the schedule, your workdays, when the day starts and ends, your timezone, and 12- or 24-hour times.
The Planner opens with your draft. Add or review duties, look over the day, then choose Use this version to make it your current copy.
Good to know
- This starts as your own working copy. Add only information your school permits you to use here.
- Other adults are optional labels you can add later. They never need an account.
- The Planner shows three Getting started steps until your first copy is in use. If you hid them, choose More in the Planner, then Show getting started.